So… I broke down and threw caution into the wind on this one… ignoring the fact that if I really screwed up my stock wheels that I’d be SOL. Oh well… you have to do that sometimes to get a sweet ride.......... I guess. Just make sure you remember, your happiness with the final product starts with proper preparation…
First things first…
Here’s what I collected:
$12 - 2 cans of Duplicolor Adhesion Promoter
$12 - 2 cans of Rustoleum Industry Choice – Semi-Gloss Black
$6 - Duplicolor Grease and Wax Remover (Left over from satoshi)
$4 – 400 Grit Sandpaper (Left over from satoshi)
$8 – 3 decks of playing cards
$5 - Masking Tape (Left over from satoshi)
Liquid Soap (lying around)
5-gal bucket (lying around)
A few rags (lying around)
Water (free-ish)
Beer (optional, yet delicious)
Approximated cost: $50-ish unless you have leftovers from prior projects.
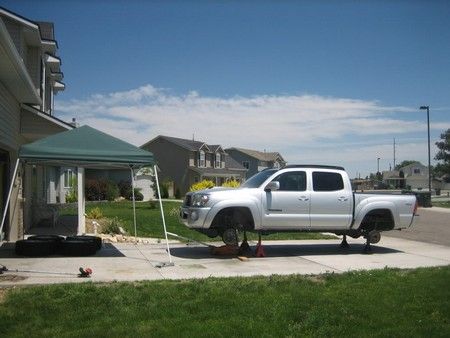
Step 1: Get yo wheelz offa dat ride!
Use your skillz to remove the wheels from your Tacoma. I used jacks to hold the entire vehicle up so that I could prepare all four wheels at the same time. I like to call the picture below “The flying Tacoma”.
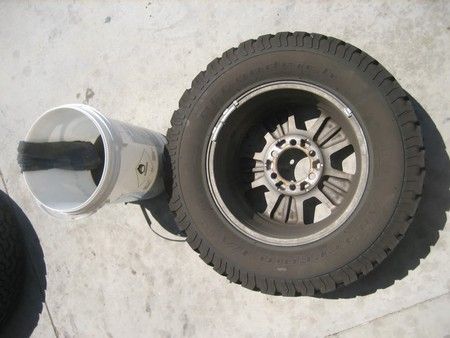
Step 2: Clean dem wheelz!
Using a bucket of water mixed with some liquid soap (and I threw in a little goo gone just for good measure) wash the wheels so they are nice and sparkly…. Or as sparkly as you can get them…
before:
after:

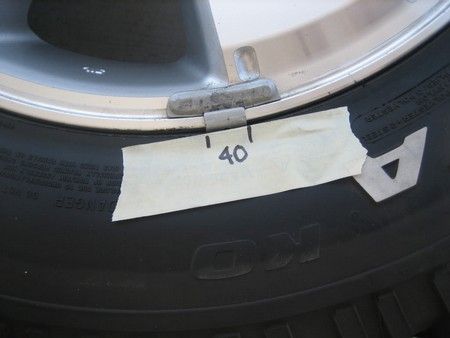
Step 3: Remove the weights
Before sanding the wheels, go ahead and tape where the weights are that are balancing your tires… mark the weight amount just to avoid any confusion… now, very carefully using a screw driver and a hammer, wedge the weights up and off of the wheel.
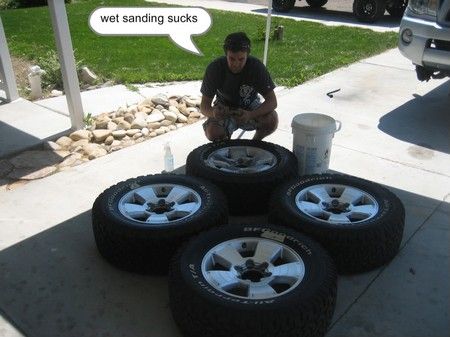
Step 4: Sand ‘em down!
Now, using a wet sanding technique… basically dipping sandpaper in water and intermittently spraying your surface with a spray bottle while sanding… remove the shiny surface from the wheels… spend some time on this and clean them off then go back and hit the areas that look like they stand out just a little too much.. Note to you: I only sanded the front since I didn’t really care what the back side looked like as long as it was black.
Step 4: Prep for paintage
Note to you: Do the back side first - I used the same method for the front and the back so you can continue reading here... no need to skip ahead in this how-to... Reason for doing the backs first is so you don't have to worry as much about the finish when you flip them over and do the fronts :)
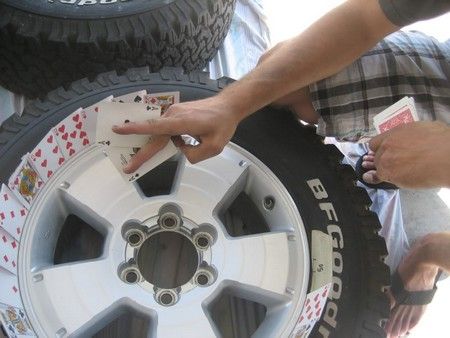
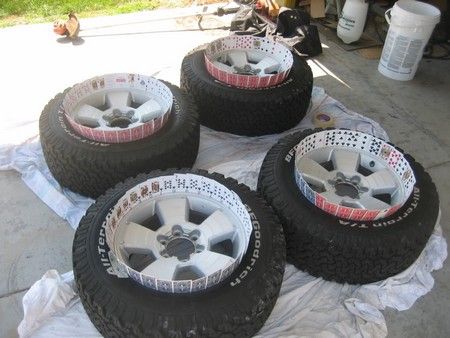
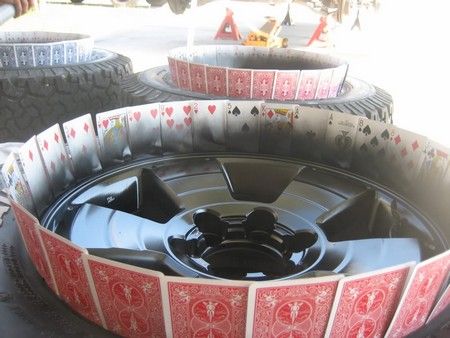
Now we need to protect the tires from overspray during the painting process… So, in order to do so, provide a barrier by inserting playing cards as shown in the photo below… I tried using index cards but there were WAY too flimsy… different tires may allow different methods, but these BFGoodrich have an edge near the wheel that required something a little stiffer to be able to fit it in the tight slot.
 Step 4 continued (further prepage):
I sprayed on the Dupicolor Grease and Wax Remover and wiped it clean with napkins… Then I sprayed 3 coats of the Dupicolor Adhesion Promoter. After applying three coats, it’s now time to move forward to the most exciting part… applying the color!
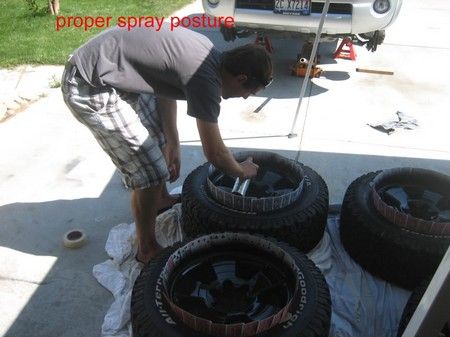
Step 5: Painting!
First, apply a light tack coat… don’t get too anxious to apply all the paint or it may blotch and look kinda… well, crappy. So… apply about 2 light coats and then you can get to the nice finish coat… Apply that last coat (the third coat) so it looks wet. This will allow the paint to spread evenly and level out giving you that finish you so desire. ALSO, don’t forget to paint those weights you took off! I painted a couple coats on the front and back of the weights.
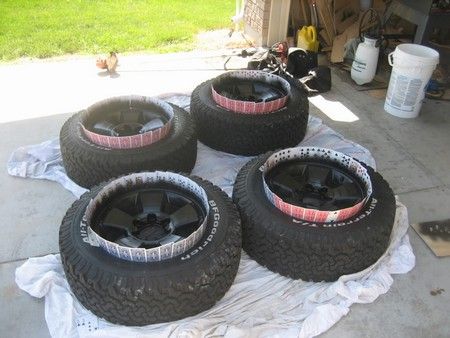
Step 5 continued: GET THE BACKS TOO!
Note to you: I hope you did the backs first either way, flip em over and do the other side. If you did the fronts first like I did (wasn't thinkin--got too excited), be extra careful not to mess up your finish.
Yeah, man! Make sure you flip those puppies over and get the other side! I propped them up with wood blocks so that the finished side wasn't touching the ground or the nice sheet I have covering the driveway… Didn’t want to risk screwing up my gnarly finish.
Step 6: Let ‘em dry!
I let my tires dry for 2 hours before I even considered placing them back on my truck and then I let them sit for another 8 hours before I even moved the thing… This is probably overkill, BUT just make sure that its dry or you’ll probably cry. AND, before you get ready to reattach these beauts to your flying ride… ATTACH the weights. Place them in their locations and bang 'em with a rubber mallet or cover them with a rag and hit them with a regular hammer until they lay flat on the wheel.
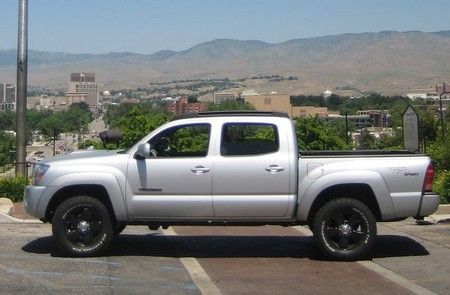
Step 7: Step back and enjoy!
Ok, now step back and... oh my, look what you’ve done! Magnifico!
 P.S. For those of you that are worried about possible scratching or chipping… Ask yourself, how easy is it to spray paint something again… seriously, repairs are so fast that its not even an issue… PLUS best part of all… I’ve been researching this and people that have done this and provided an update after a year stating that they haven't had issue and didn’t really need any repairs… Of course, I’ll keep you posted on my experience, but I already know that I had an accident when putting the wheels back on… dropped the lug wrench and scratched the wheel… BUT it just took a little wet sanding and another quick spray to feel perfectly content with the end product.
UPDATE: A month and a half of usage and these puppies are still looking GREAT!! I've been down many gravely roads too! Plus one of my friends decided to give it the extreme fingernail scratch test and was only able to walk away with a minuscule, unnoticeable amount of my paint, not much bigger than a glitter speck. I was a little peeved at him purposefully trying to scratch it, but now know that the paint isn't coming off easily. VERY SATISFIED HERE! I recommend you do this mod :)

